Android App Dev Tutorial Part 1
19 October 2013 By Bhavyanshu Parasher
Overview
Android application development is pretty simple with all the advanced IDEs available. Still there is a need to explain how to setup a proper development >environment. Also there is a need to explain how to make your application support maximum number of devices. How to deploy your application on play store and >how to build those amazing flat GUIs like that of twitter, whatsapp, google hangout app etc.
Requirements & Setup
- Android Development Tools (ADT)
- It already contains eclipse as an IDE, Android SDK and all the android platform tools required for android application development. To get the latest version head over to this and select the ADT bundle according to your machine. Be careful while selecting between 32bit and 64bit. Having the right development kit is essential.
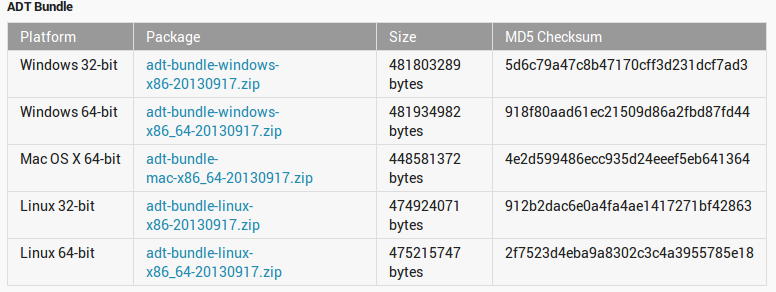
Once you have grabbed ADT, then comes the setup part.
Unpack the ZIP file (named adt-bundle–os_platform-.zip) and save it to an appropriate location, such as a “Development” directory in your home directory. Open the adt-bundle-os_platform/eclipse/ directory and launch eclipse. That’s it. If you get any Java errors, please read below before moving on.
- Java JDK
- Java is already present in Linux systems so there is no need. If you wish you can perform an update for it. In windows, the most common issue is the PATH environment variable which causes a lot of problem but i will explain you on how to fix it if in case there is an issue related to the environment variables.
For instance, this is the common type of error that people encounter once they have setup the ADT. I will quickly show you how to fix this.
A Java Runtime Environment (JRE) or Java Development Kit (JDK) must be available in order to run Eclipse. No Java virtual machine was found after searching the following locations:
C:\Development\adt-bundle-windows-x86_64-20130219\eclipse\jre\bin\javaw.exe
javaw.exe in your current PATH
- Now to fix this, first step would be to grab Java JRE.
- Then grab Java JDK.
- Once you have done this, you need to set the JAVA_HOME & PATH environment variable now.
- Right-click My Computer
- Click Properties
- Go to Advanced System Settings
- Click on the Advanced tab
- Click on Environment Variables
So the value field should look like
JAVA_HOME = C:\Program Files\Java\jdk.some.version_blah_blah
&
PATH = %JAVA_HOME%\bin; //Add this in the end of the already set value field. Do not remove anything from it.
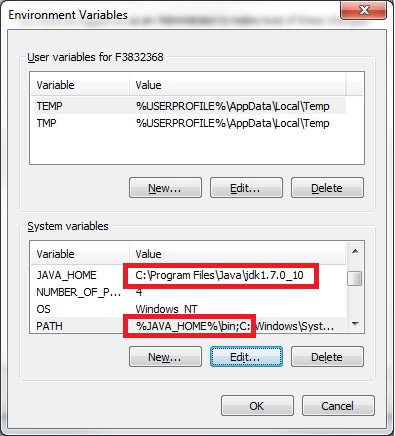
Huff, Finally now let us check if your java is setup and working perfectly fine. To test, open your command line and type <pre>java -version</pre> & also
<pre>javac -version</pre> If the output shows something like command not recognized then it is probably you have made some mistake in setting up environment variable. If you still can’t fix it, then you should probably get in touch with me via my social profiles or leave a comment at the end of this tutorial page.
Developing your first application
Now that we have ADT bundle and everything setup, we still need to download few more things. There is no compulsion to download them yet but it would be better if you do.
Launch your eclipse. Go to Window > Android SDK Manager & select API 8, 11, 15, 18. Let it download and install. This way you will have virtual images & SDK platforms for specific android versions for testing your application. Next thing to do is to create virtual devices so that you can test your application. Once you have got APIs from above step, you can go to Window > Android Virtual Device Manager > New & fill in the details for virtual device. For example, i will show you what i have set for the emulator running API 8.
- AVD Name : Any_Random_Name_API8
- Device : 5.1” WVGA
- Target : API Level 8
- CPU/ABI : ARM(armeabi)
- Keyboard : selected
- Skin : Selected
- Memory Options > RAM : 1024 , VM Heap : 16
- Internal Storage : 100 MiB
- SD Card : 50 MiB
Rest left empty.
Now simply select Ok and you have setup your first emulator with API level 8 to test your android application.
Hello World - Your first android application
First go to File>New>Android Application Project & fill in the details as shown below.
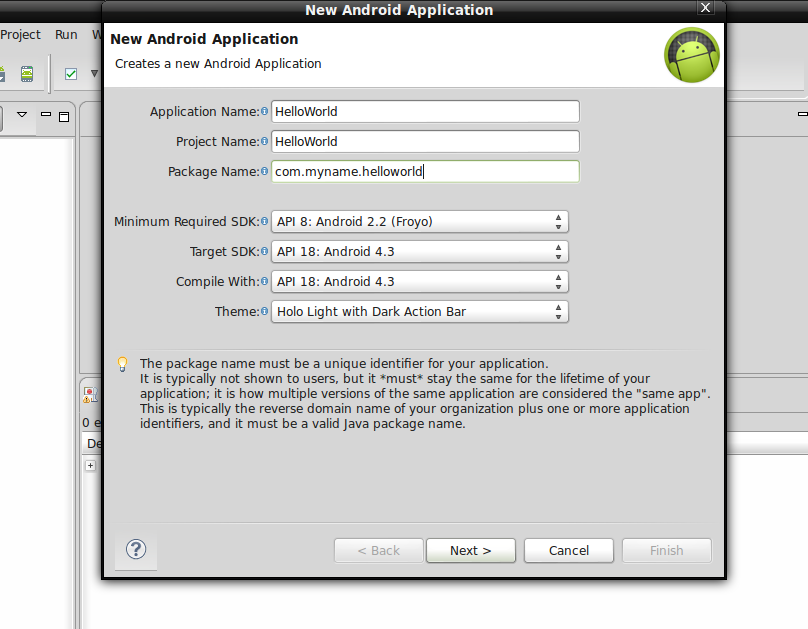
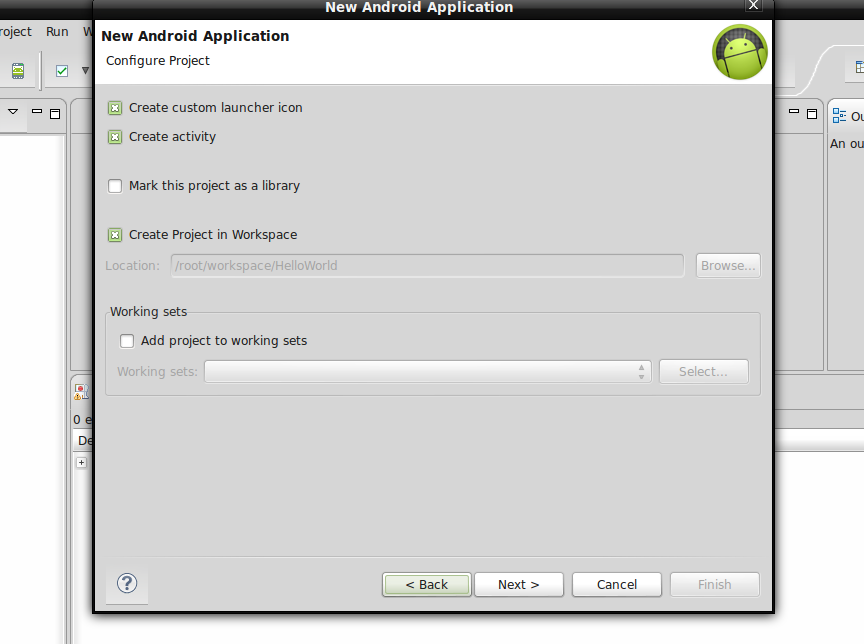
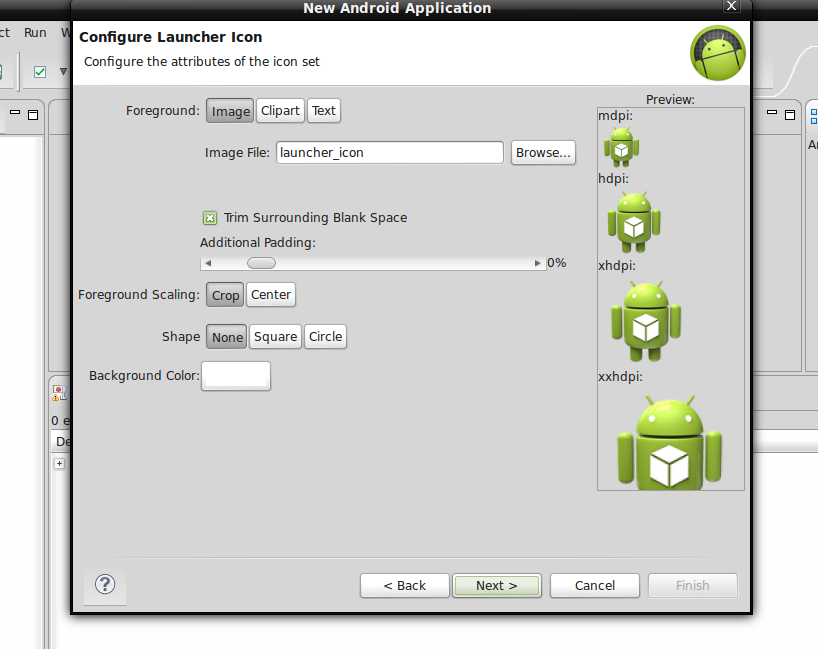
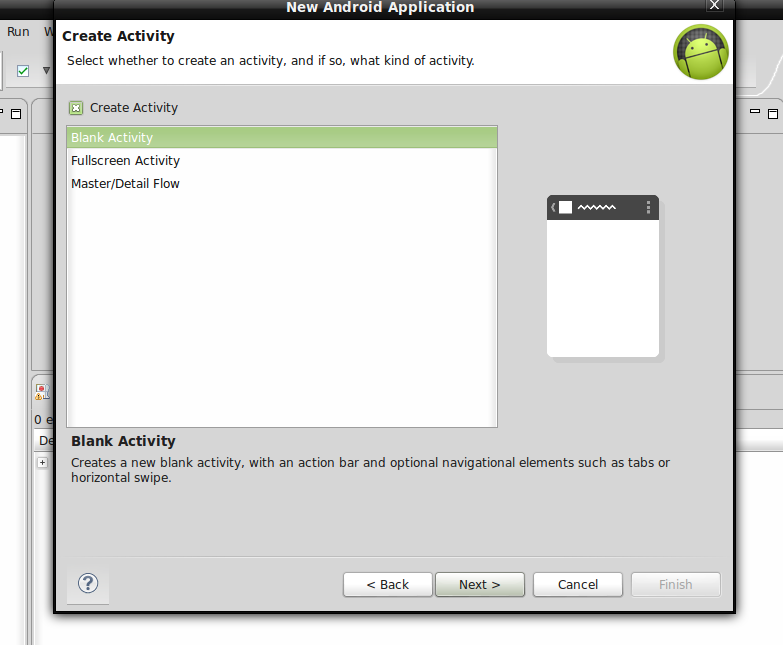
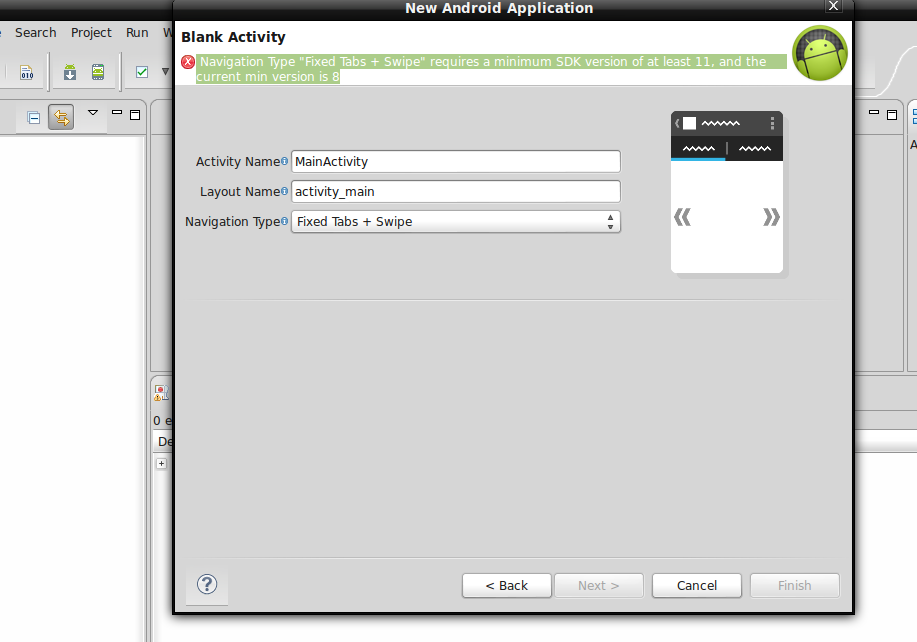
In the last image, you can see that it is generating the error that we need API 11 to add these UI features. So either we will use ActionBarSherlock to add these features to support in API level 8 or else we will create for API 11 and above. That is upto you. I will teach you both. I will create a special tutorial on how to use ActionBarSherlock as well. For now you can go on with API 11 and create these.
Now after going through above steps, you will see in package explorer that you have a project named HelloWorld. That will have your complete android application source code. Browse through it and look for folder src>MainActivity.java. Double-click on this file and you will see hello world code in it already written. To run the application, simply right click on HelloWorld>Run>Run as Android Application and it will launch the emulator with API 11 (Don’t forget to create it like we created for API 8). Wait for it to initialize. It often takes a while in first run and after that it won’t. It will automatically launch the code in MainActivity.java as it is defined in the AndroidManifest file for the project. You can look it up in the package manager. You will see “Hello World” written inside the application home screen.
Hurray! You just got done with your first android application.
Now the real tweaking begins. Click Next or take a look at Table of Contents.
For any questions regarding the first part, comment below!
blog comments powered by Disqus