How to format SDHC in linux using command line - Partitioning for Raspberry Pi NOOBS
11 August 2015 By Bhavyanshu Parasher
First you need to insert your SDHC card in your laptop’s card reader slot. On linux mint 17 it shows a popup asking what to do. Ignore that. It simply auto-mounts it for you when you put it in the slot. We don’t want it mounted at first. So just unmount or “safely remove” the SDHC but do not pull it out.
Now most of these commands require super user or sudo. First we will see if fdisk detects the unmounted SDHC or not. Use command
$ sudo fdisk -l
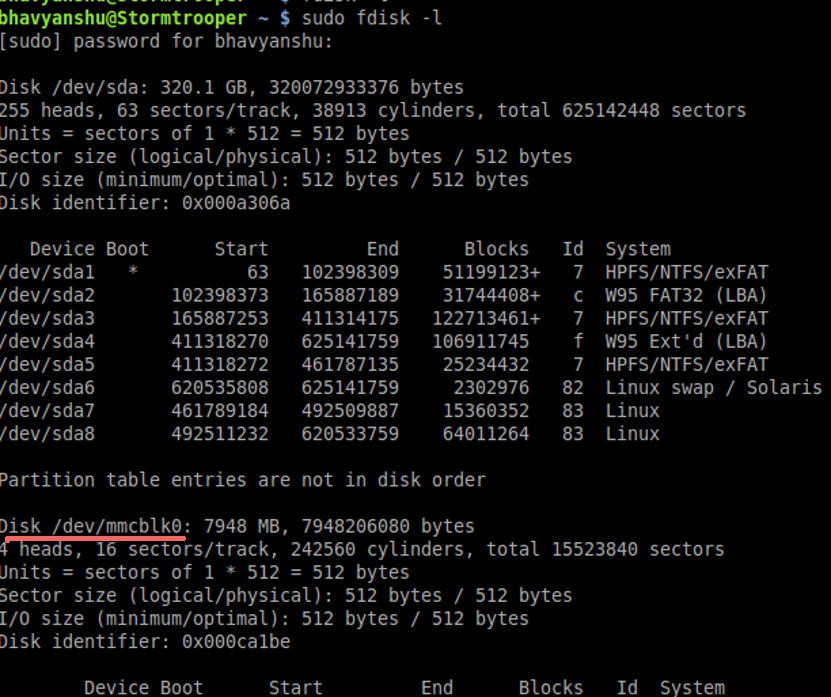
It would output something like this. Your SDHC is being shown like /dev/mmcblk0

Next, we need to format and partition it. With the following command, you will go into fdisk prompt mode. Just type in whatever alphabets I have entered.
$ sudo fdisk /dev/mmcblk0

Command (m for help): p

Disk /dev/mmcblk0: 7948 MB, 7948206080 bytes
............
............

Command (m for help): n
Partition type:
   p   primary (0 primary, 0 extended, 4 free)
   e   extended
Select (default p):
Using default response p

Partition number (1-4, default 1): 1

First sector (2048-15523839, default 2048):
............
............

Command (m for help): p

Disk /dev/mmcblk0: 7948 MB, 7948206080 bytes
............
............
Disk identifier: 0x000ca1be

        Device Boot      Start         End      Blocks   Id  System
/dev/mmcblk0p1            2048    15523839     7760896   83  Linux

Command (m for help): t
Selected partition 1

Hex code (type L to list codes): b
Changed system type of partition 1 to b (W95 FAT32)

Command (m for help): p

Disk /dev/mmcblk0: 7948 MB, 7948206080 bytes
............
............
Disk identifier: 0x000ca1be

        Device Boot      Start         End      Blocks   Id  System
/dev/mmcblk0p1            2048    15523839     7760896    b  W95 FAT32

Command (m for help): w
The partition table has been altered!

Calling ioctl() to re-read partition table.

WARNING: If you have created or modified any DOS 6.x
partitions, please see the fdisk manual page for additional
information.
Syncing disks.
Use this to change FAT to VFAT.
$ sudo mkfs.vfat /dev/mmcblk0p1
Now let us get the NOOBS zip file. Download NOOBS from here. Once you have downloaded the NOOBS zip file, it is wise to check the SHA1 of the file you downloaded with the SHA1 provided on the page from where you downloaded it. To check, type in terminal
$ cd ToDirectoryWhereZipFileIs
$ echo "279cdeb50861d2ef2681b4d1f5e98c40581f48b1 *NOOBS_v1_4_1.zip" | sha1sum -c -
Replace that SHA1 hash I wrote with the one provided by Raspberry Pi webpage from where you downloaded this zip file. If it says “OK” then it means the SHA1 match. If it says “sha1sum: WARNING: 1 computed checksum did NOT match”, then your Zip file got corrupted while downloading. You will have to download it again.
Next we mount our SDHC. Type,
$ sudo mount | grep -i mmcblk0p1
It will output something like “/dev/mmcblk0p1 on /media/bhavyanshu/3698-4AF2 type vfat…”
Copy the /media.. part and cd into that. After that, you will have to unzip your downloaded zip file in that mounted SDHC. Like,
$ cd /media/bhavyanshu/3698-4AF2/
$ sudo unzip /pathtodownloadedZipFile/NOOBS_v1_4_1.zip
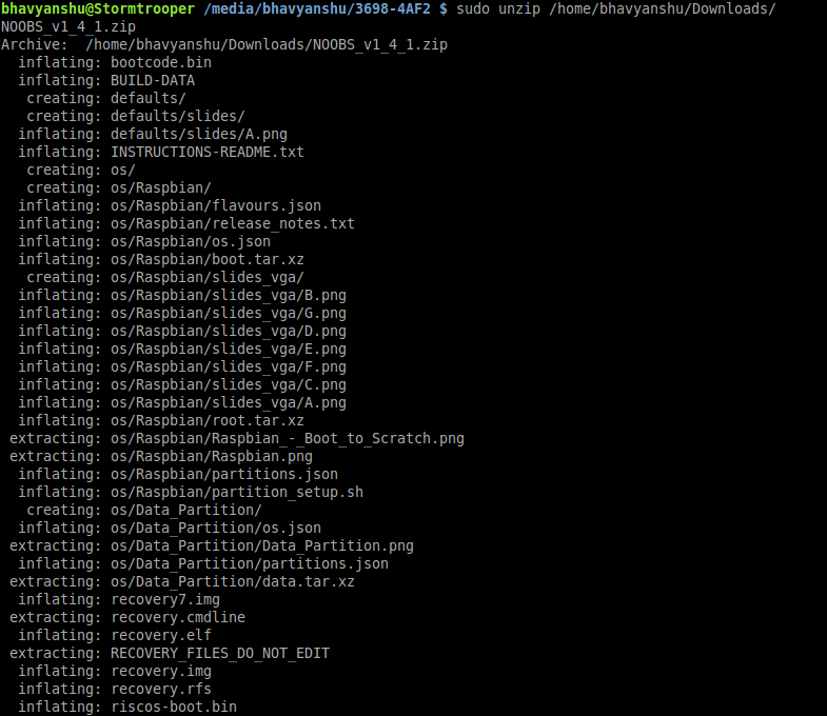
Let it finish. It is basically unpacking the archive. It would look like this.

Once it is done, unmount the SDHC and put it in Raspberry Pi and boot into NOOBS. If in case you don’t see anything on the screen, don’t panic. Follow this post of mine. Usually this happens with people using composite cable for video output. Follow the post and it will solve your problem.
That’s all there is. You can find more of my Raspberry Pi tutorials here.
blog comments powered by Disqus