How to use the GPIO pins on Raspberry Pi
07 March 2014 By Bhavyanshu Parasher
Overview
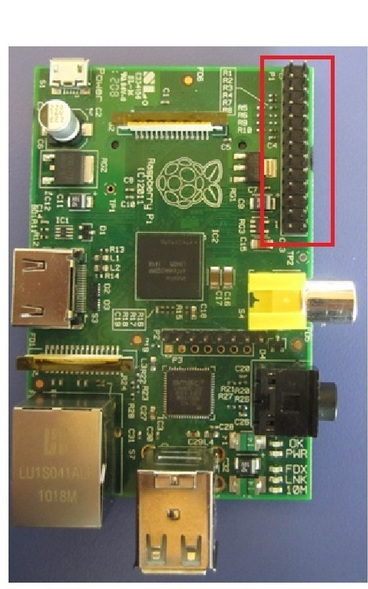
In previous tutorials, we have seen that how Raspberry Pi offers us USB ports, Composite video port, HDMI port etc. Now in this tutorial we will see how we can use the on-board GPIO Pins. We will be programming in Python. But before moving on, let’s get familiar with what exactly GPIO is.
What is GPIO?
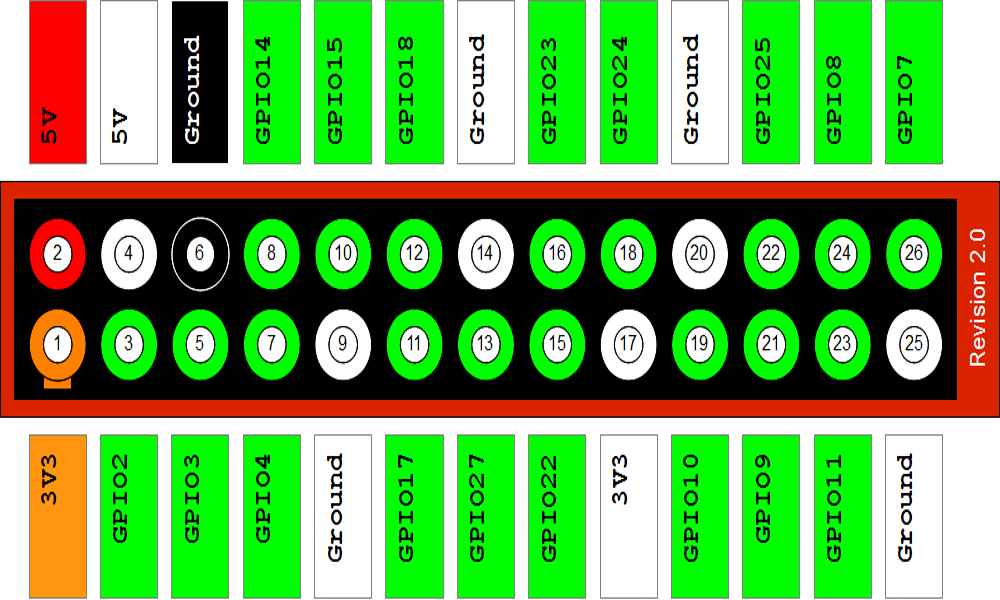
General-purpose input/output (GPIO) is a generic pin on an integrated circuit (commonly called a chip) whose behavior (including whether it is an input or output pin) can be controlled (programmed) by the user at run time. The GPIO pins are available on the PCB via a header and allow you to interface the Pi to the real world. The header provides 17 Pins that can be configured as inputs and outputs. By default they are all configured as inputs except GPIO 14 & 15. In order to use these pins you must tell the system whether they are inputs or outputs. We will now see how can we do that.

For this tutorial, you will be needing some more electrical hardware. You can easily find this stuff in your local store.
Requirements
- Jumper Wires
- LEDs, preferrably both RED X 2
- 50 Ohm Resistors X 4
- A breadboard to avoid errors during connections
- Must have an idea about basic electrical connections.
Let’s Begin
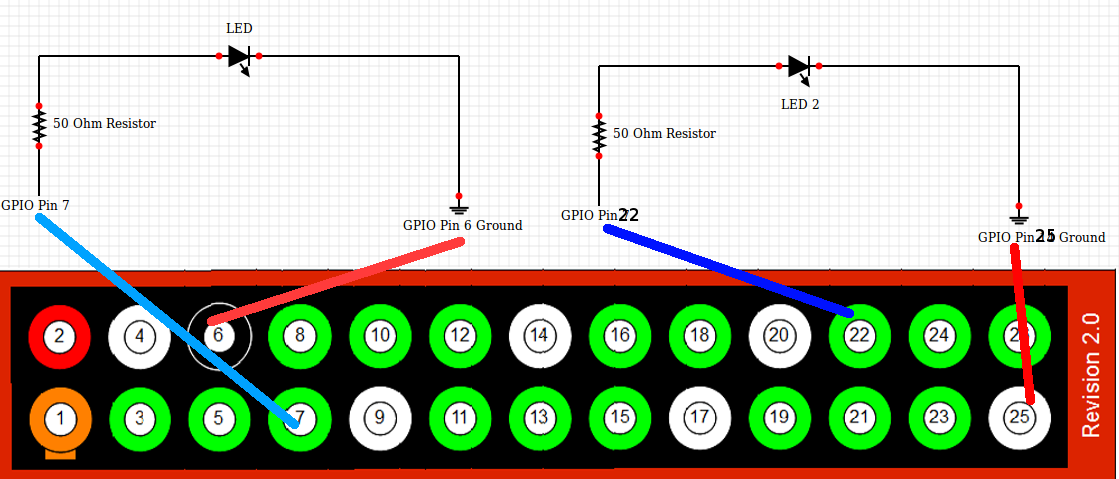
The connection has been shown in the image below


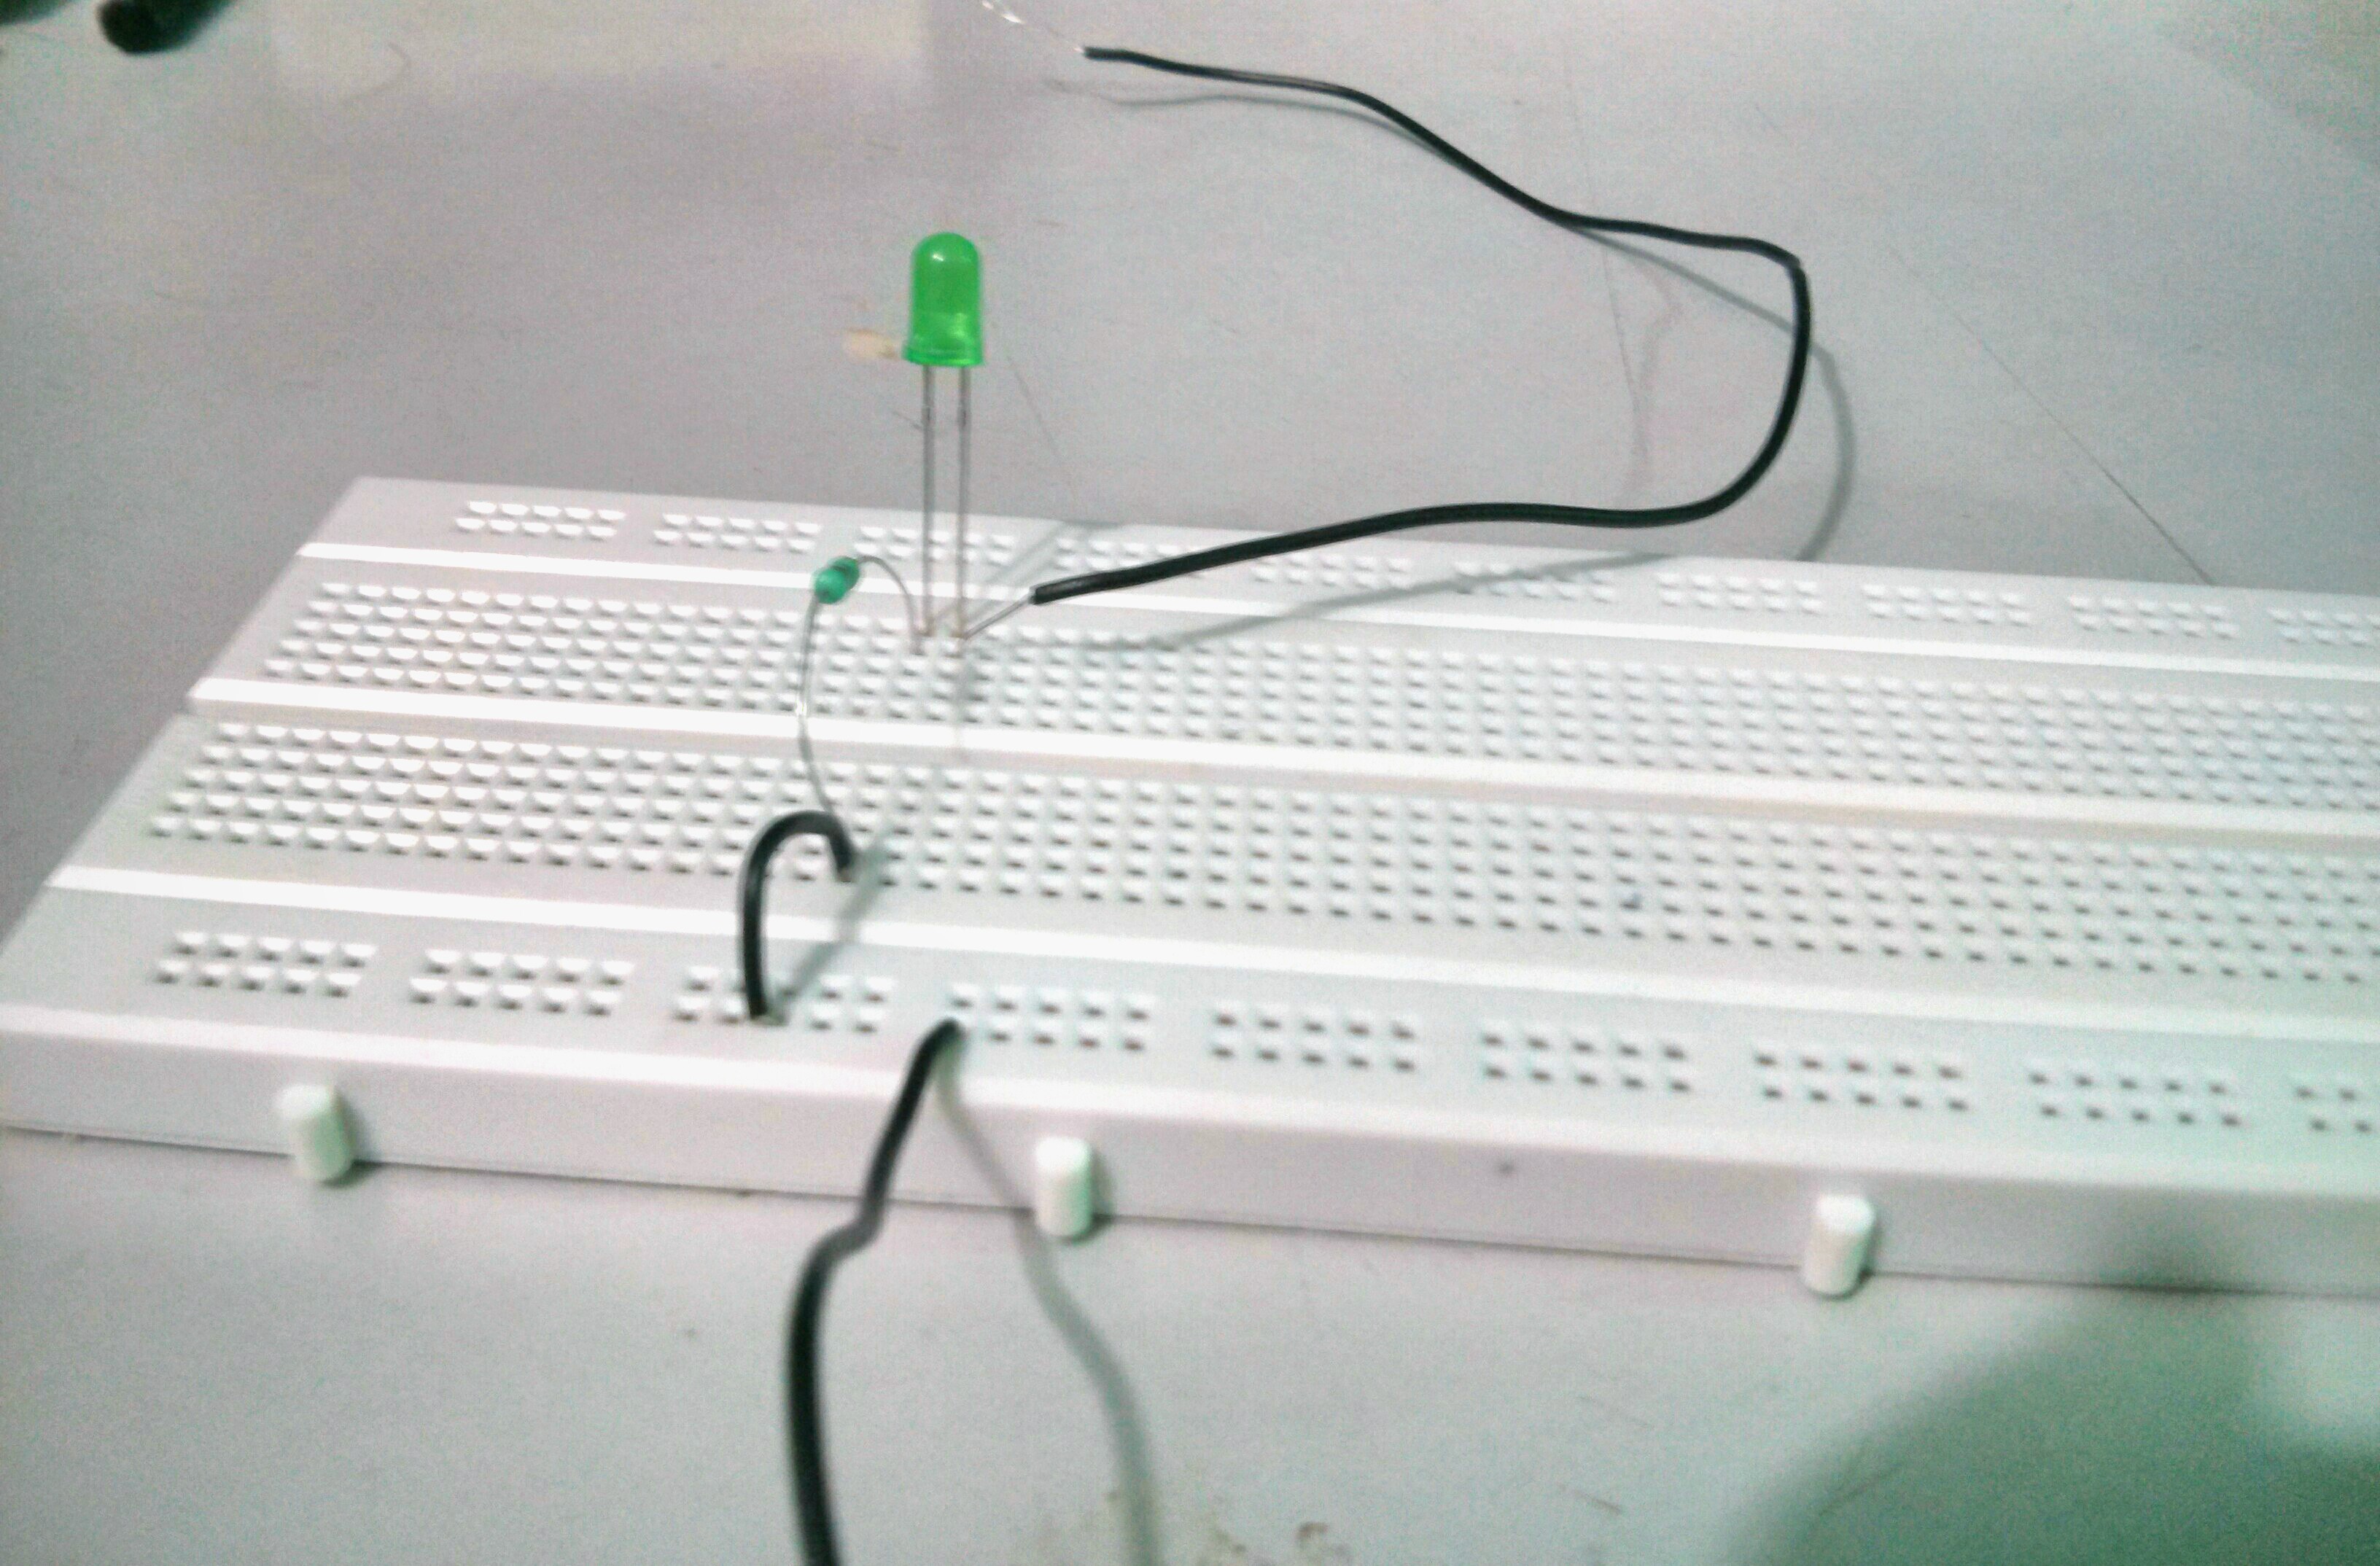
Mine looks like this. I did not have jumper wires of different colors. So don’t be confused. Refer to above diagrams only.

By GPIO Pin Number, I mean the actual Pin number and not the GPIO Number. So be careful with that. Once you are sure you have made the connections as shown above, we are going to write a program in Python to get LED blink.
I am assuming you are not familiar with Python. So I will explain each and every step on how to get this simple program runnig.
- Login to your Raspbian OS. On terminal, type
mkdir led. This is optional of-course. - Next,
cd ./ledand typenano led.py. Nano is the terminal based editor that I often use. You can use any editor. - Now in that led.py file, add the following code
import RPi.GPIO as GPIO
import time
GPIO.setmode(GPIO.BOARD)
GPIO.setup(7,GPIO.OUT)
def Blink(numTimes,speed):
	for i in range(0,numTimes):
		print "Blanking "+str(i+1)
		GPIO.output(7,True)
		time.sleep(speed)
		GPIO.output(7,False)
		time.sleep(speed)
	print "Enough of this blinking!"
	GPIO.cleanup()
iterations = 10
speed = 2
Blink(iterations,speed)
- Next thing you need to do is save and exit the file using ctrl+x and then hit y. NOTE: This is a python code. Do not mess up indentation of it.
- Before running the program, make sure the connections are correctly set up.
- Now run the program using
sudo python led.py. You should see your LED blinking.
That’s all. Now there is something you should experiment around. Like for example this program. The circuit diagram for the below program is shown after the program. Do try this out.
#Program to blink two LEDs one at a time.
import RPi.GPIO as GPIO
import time
GPIO.setmode(GPIO.BOARD)
GPIO.setup(7,GPIO.OUT)
GPIO.setup(22,GPIO.OUT)
def Blink(numTimes,speed):
	for i in range(0,numTimes):
		print "Blanking "+str(i+1)
		GPIO.output(7,True)
		GPIO.output(22,False)
		time.sleep(speed)
		GPIO.output(7,False)
		GPIO.output(22,True)
		time.sleep(speed)
	print "Enough of this blinking!"
	GPIO.cleanup()
iterations = 10
speed = 2
Blink(iterations,speed)

View more tutorials on Raspberry Pi
blog comments powered by Disqus